
Submitted ByEdit Dates
Date Uploaded: September 20, 2013, 8:21 pm Last Edited: December 21, 2015, 2:18 am |
 Add to Add toSite Favourites Print this Article |
European 4 in 1: Flat Expanding Circle
Article © MAIL User: Chainmailbasket_com
This article was written by sakredchao and submitted with his permission.
This (European 4 in 1) is woven using the "one open: one closed" weaving method. The ratio is slightly different, but the principle is the same.
The queen ring (wide mouth canning lid) is larger than the shower curtain rings.
All pink rings are woven as open rings.
All white rings are woven as closed rings.
All green rings are expansion rings, woven as closed rings or added afterward as open rings.
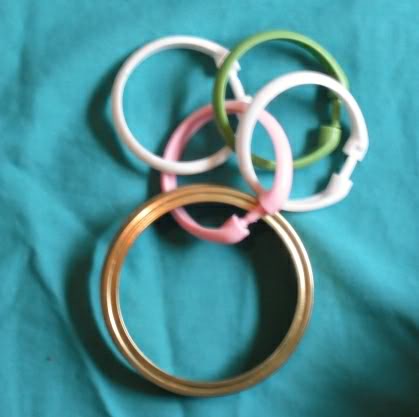
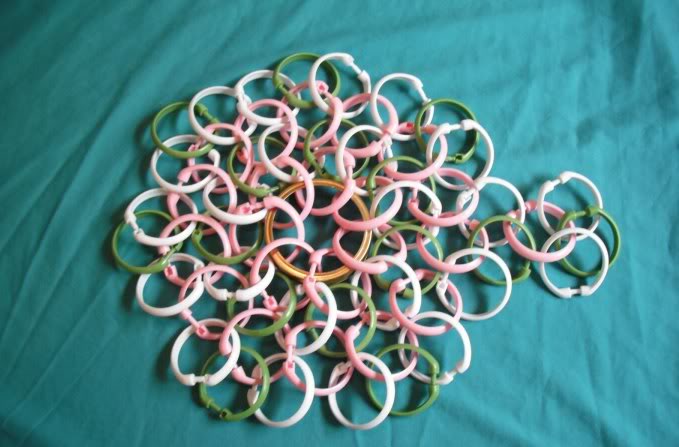
I start with my queen ring closed.
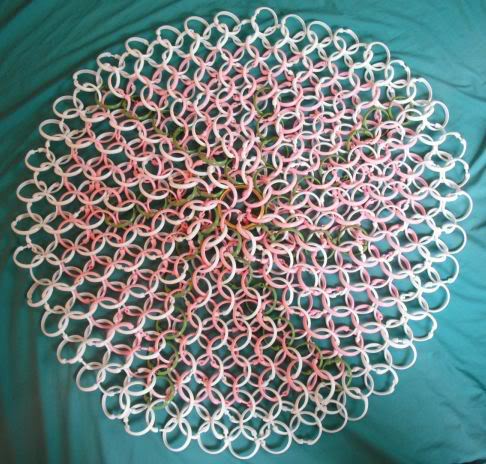
I weave my way around the queen ring, until the weave lays flat on the table when connected. You can see that 6 pink rings on the queen is not quite enough to make this work, it takes 7. When you have the first circle connected, the queen ring should be able to freely pass through the center. You can see the rings sticking up in the first image. This is not loose and the shower curtain rings will not flop to either side of the queen ring.
Each ring size is different. If you -need- it to be 6 rings around, use larger rings for the shower rings or a smaller queen ring. I have had the number of rings around the queen be anywhere from 6 to 12. The number of rings on your queen dictate how many expansion rings you will have.
This is the most important step. If this step is done improperly, the rest of the project will reflect that. When laid out flat, it should not bunch up (nipple), in the middle (at the queen ring). You should be able to hold the queen ring between your thumb and index finger and have the outer row flop to one side or the other. If you were to have woven one less ring around the queen, it should be too tight.
================
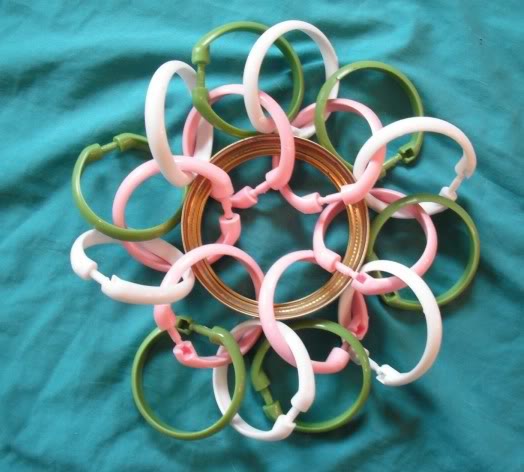
When I begin to weave my next row, I place my stitch with the expansion ring first. I place it directly off of an expansion ring in the previous row. On the first row I place an expansion ring on every stitch. Here on the second row, I place an expansion ring every other stitch.
================
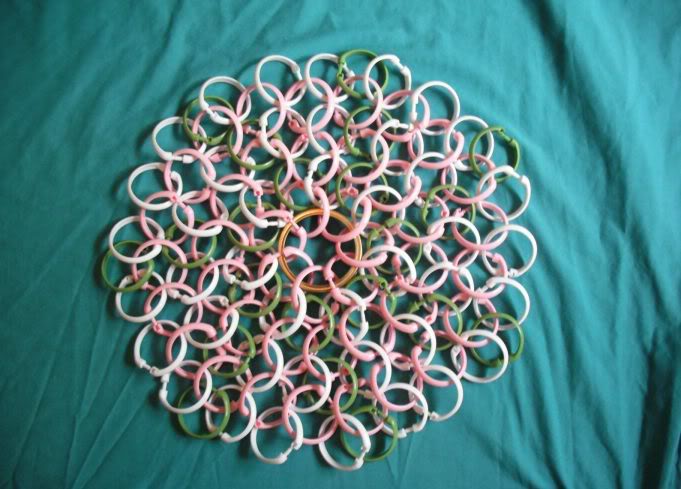
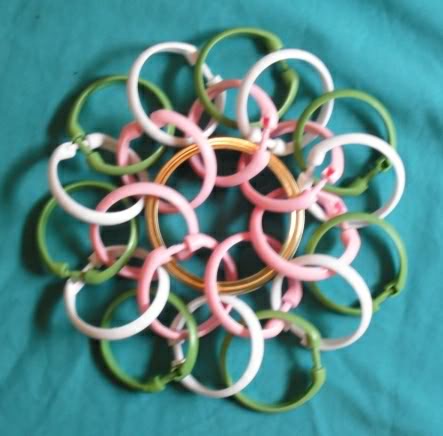
Here you can see the expansion lines begin to form as the piece progresses.
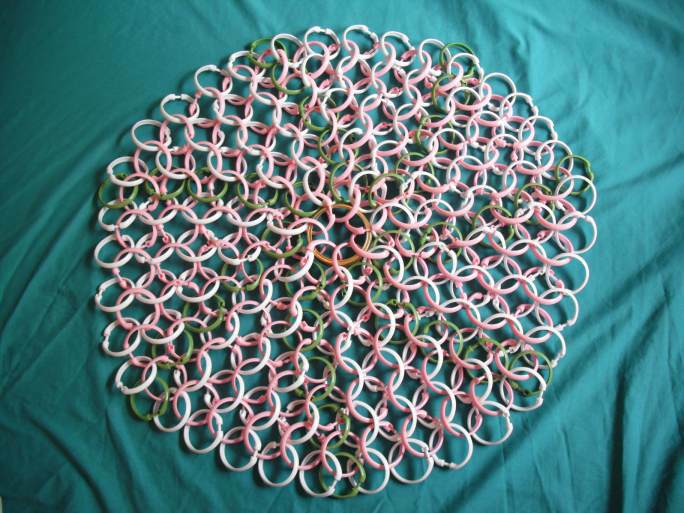
An alternate method of adding expansion rings is to add them after the row is woven on. This avoids confusion when using a smaller expansion ring. (see below)
When weaving metal, my white and pink rings are the same size and the green rings are slightly smaller. You can see the green rings only pass through 3 other rings. When you use the same size rings for the expansions, they will stick up slightly and not look clean. Slightly smaller expansion rings fixed this problem.
However you decide to add your expansion rings, all expansion rings should have the same number of "white" rings between them. You can check this by either visually scanning around the edge of the piece and counting. You can also check this by following the expansion lines out from the center.
================
The biggest problem you are likely to encounter is over expansion. Check at the end of every row, to make sure the circle lays flat and the sections of standard e4, between the expansions, are near full stretch without being stiff and restricted or becoming crowded.
You can fix over expansion in a couple of ways. Either by removing some of the expansion rings in the outer row. (Make sure you remove them equally around the edge. Look at how I chose to dish 7 expansion rings in the example below.)
The second way that I have found works well is to add a non expanding row and afterward continue expanding as usual.
If you find yourself having to fiddle with the expansions to get them right, cut in at the expansions. No need to remove work on the straight e4 sections between the expansions. Check the spacing of the rings on the outer edge. They should be at, or near, full stretch. Check the queen ring. If you are getting the nipple effect at the queen ring before you start dishing, there is something wrong.
A quick and easy test is to put your finger on the queen ring and slide the piece around on the table. Wiggle it back and forth. The entire piece should move with your finger if the tension is even throughout.. There will be a little slack here and there, but it is up to you to decide how much is acceptable.
================
Dishing
Dishing is how you would make a coif shaped like a head, as opposed to being shaped like a #10 can of corn..
If you wish to dish the piece, you can begin to remove expansions. The piece I made here would be awkward to dish as 7 doesn't divide up very easily, being a prime number. A piece with 12 expansions dishes well, as you have many options. The more factors a number has, the more it lends itself to dishing.

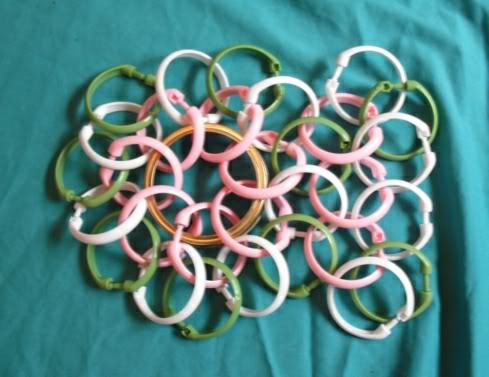
Here, you can see I removed 3 of the outer expansion rings and continued the other 4 expansion lines. I could not dish evenly, so I did the best I could.
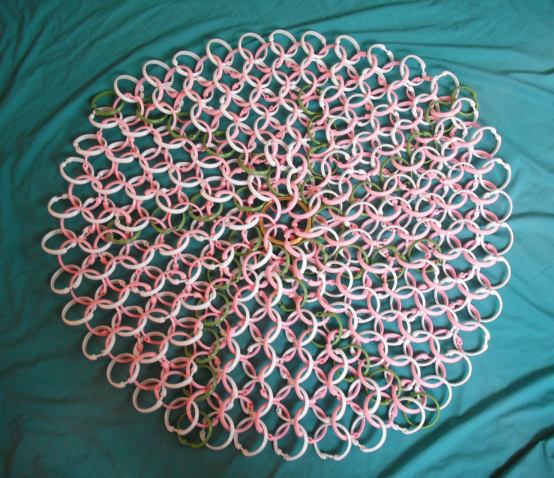
You can see that as the outer rows fill in, the middle begins to get messy and crowded.
The further you go, the more the middle will nipple when laid out on a flat surface.
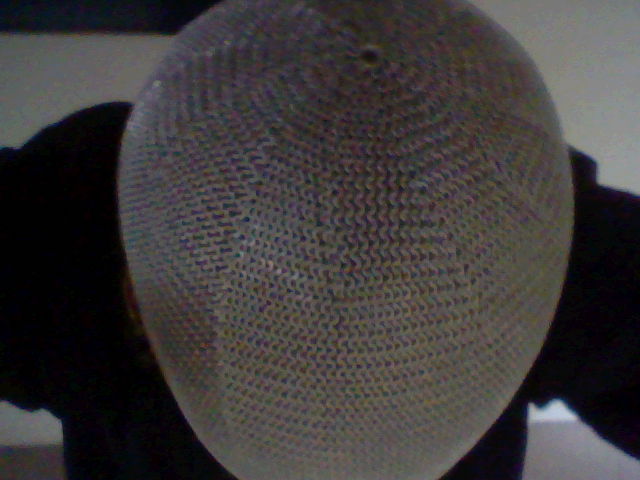
This hat was made with 12 expansion lines. You can see that they end at different places. You can see one set clearly in this image. There are 3 sets of 4 expansion lines.
================
This (European 4 in 1) is woven using the "one open: one closed" weaving method. The ratio is slightly different, but the principle is the same.
The queen ring (wide mouth canning lid) is larger than the shower curtain rings.
All pink rings are woven as open rings.
All white rings are woven as closed rings.
All green rings are expansion rings, woven as closed rings or added afterward as open rings.
I start with my queen ring closed.
I weave my way around the queen ring, until the weave lays flat on the table when connected. You can see that 6 pink rings on the queen is not quite enough to make this work, it takes 7. When you have the first circle connected, the queen ring should be able to freely pass through the center. You can see the rings sticking up in the first image. This is not loose and the shower curtain rings will not flop to either side of the queen ring.
Each ring size is different. If you -need- it to be 6 rings around, use larger rings for the shower rings or a smaller queen ring. I have had the number of rings around the queen be anywhere from 6 to 12. The number of rings on your queen dictate how many expansion rings you will have.
This is the most important step. If this step is done improperly, the rest of the project will reflect that. When laid out flat, it should not bunch up (nipple), in the middle (at the queen ring). You should be able to hold the queen ring between your thumb and index finger and have the outer row flop to one side or the other. If you were to have woven one less ring around the queen, it should be too tight.
================
When I begin to weave my next row, I place my stitch with the expansion ring first. I place it directly off of an expansion ring in the previous row. On the first row I place an expansion ring on every stitch. Here on the second row, I place an expansion ring every other stitch.
================
Here you can see the expansion lines begin to form as the piece progresses.
An alternate method of adding expansion rings is to add them after the row is woven on. This avoids confusion when using a smaller expansion ring. (see below)
When weaving metal, my white and pink rings are the same size and the green rings are slightly smaller. You can see the green rings only pass through 3 other rings. When you use the same size rings for the expansions, they will stick up slightly and not look clean. Slightly smaller expansion rings fixed this problem.
However you decide to add your expansion rings, all expansion rings should have the same number of "white" rings between them. You can check this by either visually scanning around the edge of the piece and counting. You can also check this by following the expansion lines out from the center.
================
The biggest problem you are likely to encounter is over expansion. Check at the end of every row, to make sure the circle lays flat and the sections of standard e4, between the expansions, are near full stretch without being stiff and restricted or becoming crowded.
You can fix over expansion in a couple of ways. Either by removing some of the expansion rings in the outer row. (Make sure you remove them equally around the edge. Look at how I chose to dish 7 expansion rings in the example below.)
The second way that I have found works well is to add a non expanding row and afterward continue expanding as usual.
If you find yourself having to fiddle with the expansions to get them right, cut in at the expansions. No need to remove work on the straight e4 sections between the expansions. Check the spacing of the rings on the outer edge. They should be at, or near, full stretch. Check the queen ring. If you are getting the nipple effect at the queen ring before you start dishing, there is something wrong.
A quick and easy test is to put your finger on the queen ring and slide the piece around on the table. Wiggle it back and forth. The entire piece should move with your finger if the tension is even throughout.. There will be a little slack here and there, but it is up to you to decide how much is acceptable.
================
Dishing
Dishing is how you would make a coif shaped like a head, as opposed to being shaped like a #10 can of corn..
If you wish to dish the piece, you can begin to remove expansions. The piece I made here would be awkward to dish as 7 doesn't divide up very easily, being a prime number. A piece with 12 expansions dishes well, as you have many options. The more factors a number has, the more it lends itself to dishing.
Here, you can see I removed 3 of the outer expansion rings and continued the other 4 expansion lines. I could not dish evenly, so I did the best I could.
You can see that as the outer rows fill in, the middle begins to get messy and crowded.
The further you go, the more the middle will nipple when laid out on a flat surface.
This hat was made with 12 expansion lines. You can see that they end at different places. You can see one set clearly in this image. There are 3 sets of 4 expansion lines.
================
Original URL: http://www.mailleartisans.org/articles/articledisplay.php?key=668
